Don’t throw out your almost empty paint buckets!!
Moving into a new Home? Just finished your renovation?
Or just low on redecorating funds? Don’t throw out your almost empty paint buckets!!
As seen on HGTV’s “Southern Spitfire” with Abbi Williams, this is a fun… easy… inexpensive way to create custom art for your home!
The cost of art created in this blog is $20.00 per piece, and trust me folks…anyone can do this! Feel free to even involve your kids.
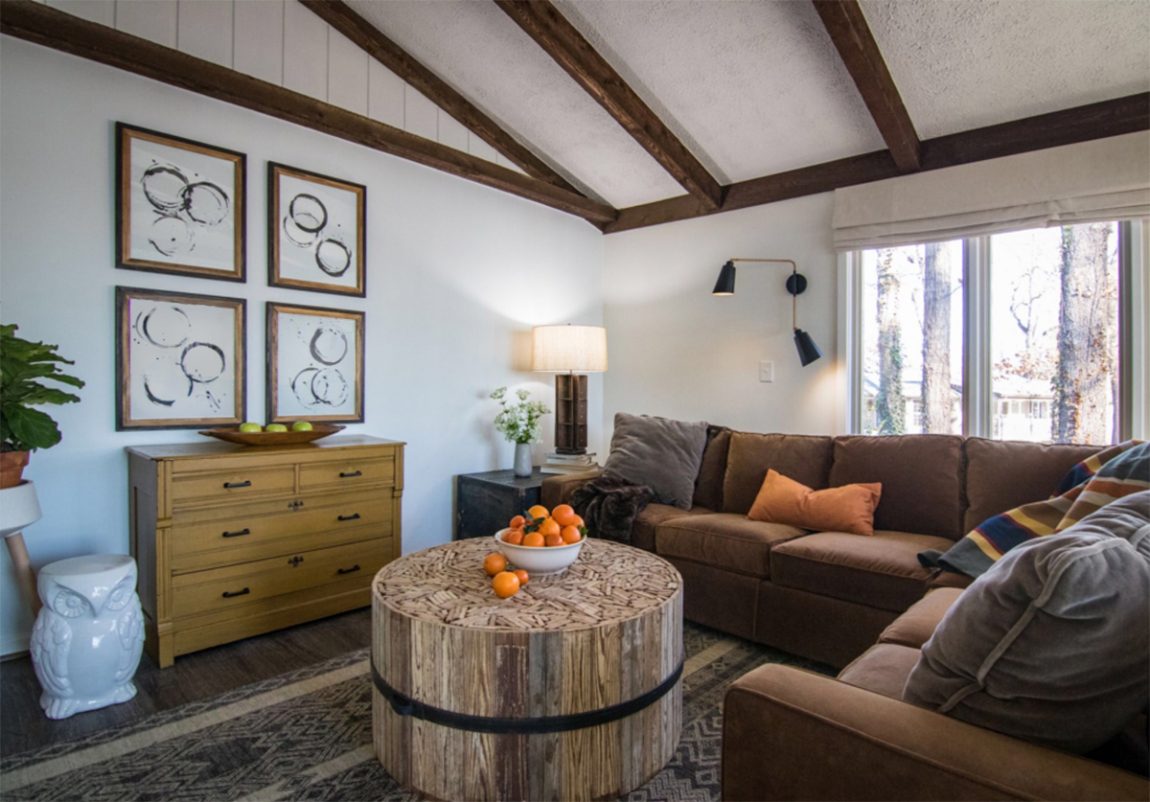
As a designer when you create a customized collection, or series, it elevates the look of the room.
I can’t tell you how many times, even with all my budgeting and planning, the funds are completely gone by the time it comes to accessorize with art work. There just isn’t any money available to buy art,… heck, even inexpensive mirrors are out of the question.
Just think of the possibilities of having a collection of “custom art” pieces down long hallways, or on huge empty walls, or my favorite, a custom art for baby nurseries. As a designer there is always a completion to the look when you have a series, so if you’re thinking of creating paint can art, think in even numbers of artwork. I did 4 matching framed pieces, but even 6 or 8 would look incredible grouped together on a wall equally spaced.

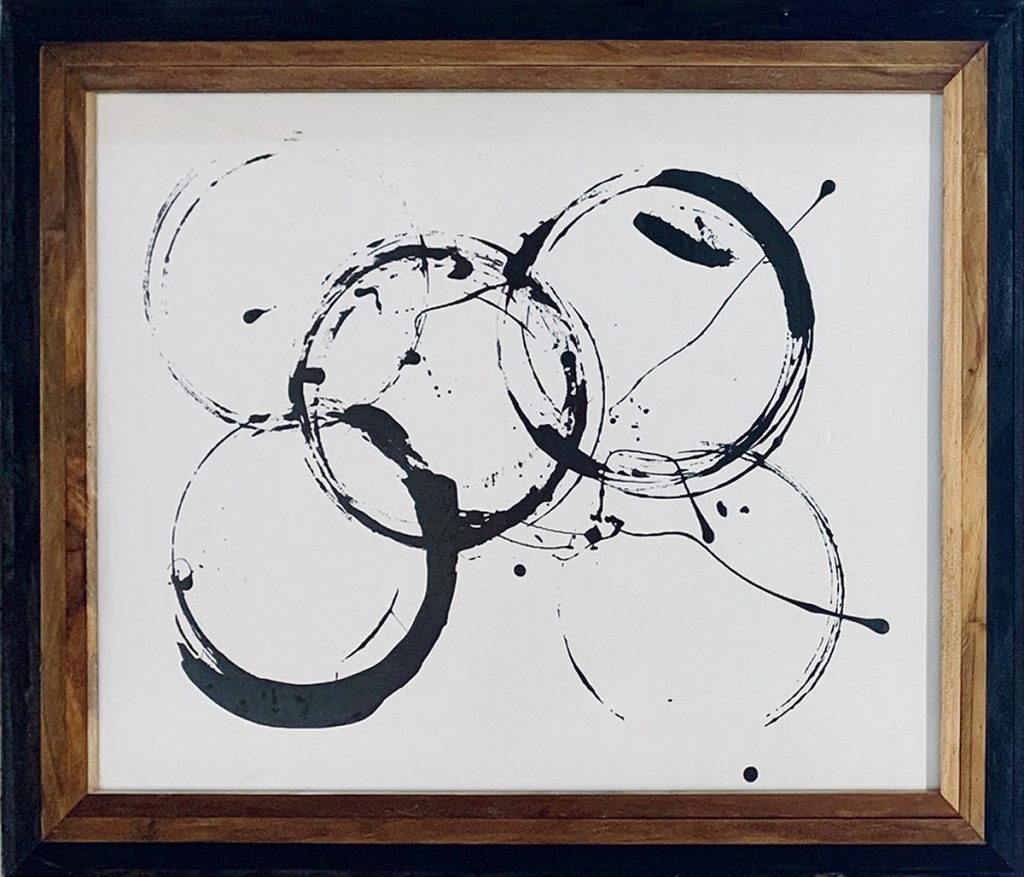
One trick to getting such a “custom” look is using the left over paint from the bottom of the buckets of paint you used in the interior of the home. This keeps the colors in the art you’re creating consistent with the colors used inside the home. In this case I used Sherwin Williams Urbane Bronze SW 7048. This was the color of the handrails and newel post on the stairwell, as well as the color painted on the fireplace brick of Olde Oak Trail, the home we renovated for our HGTV “Southern Spitfire” pilot Episode 101.
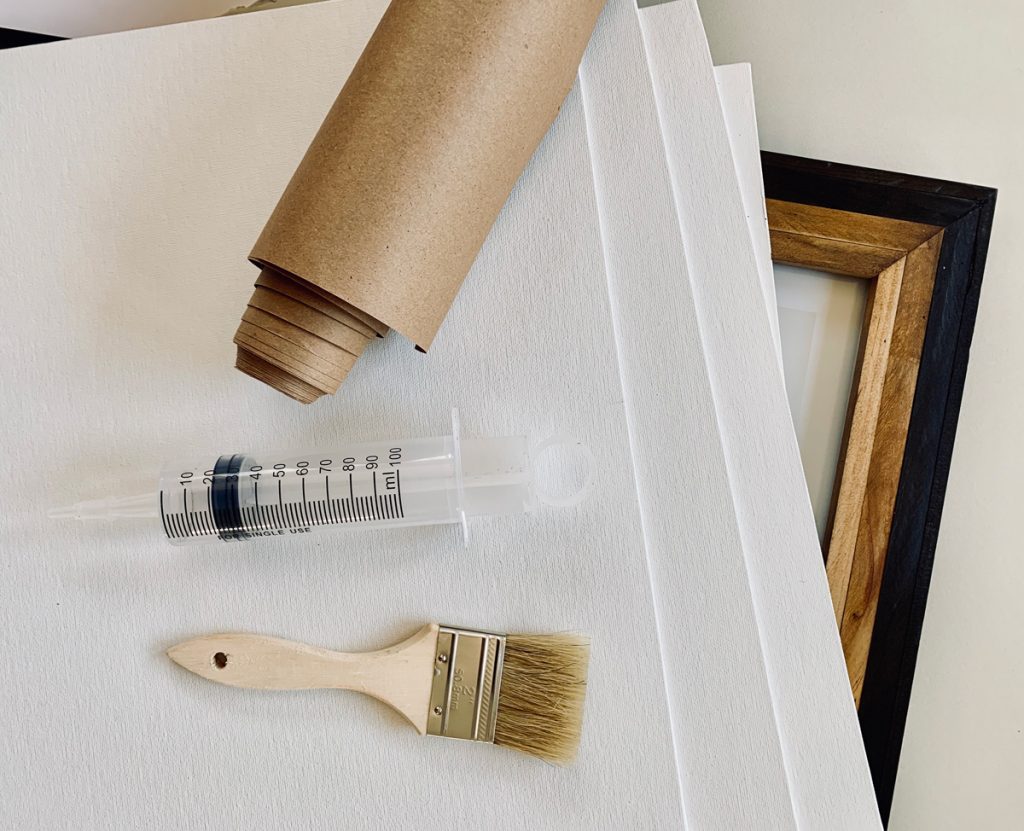
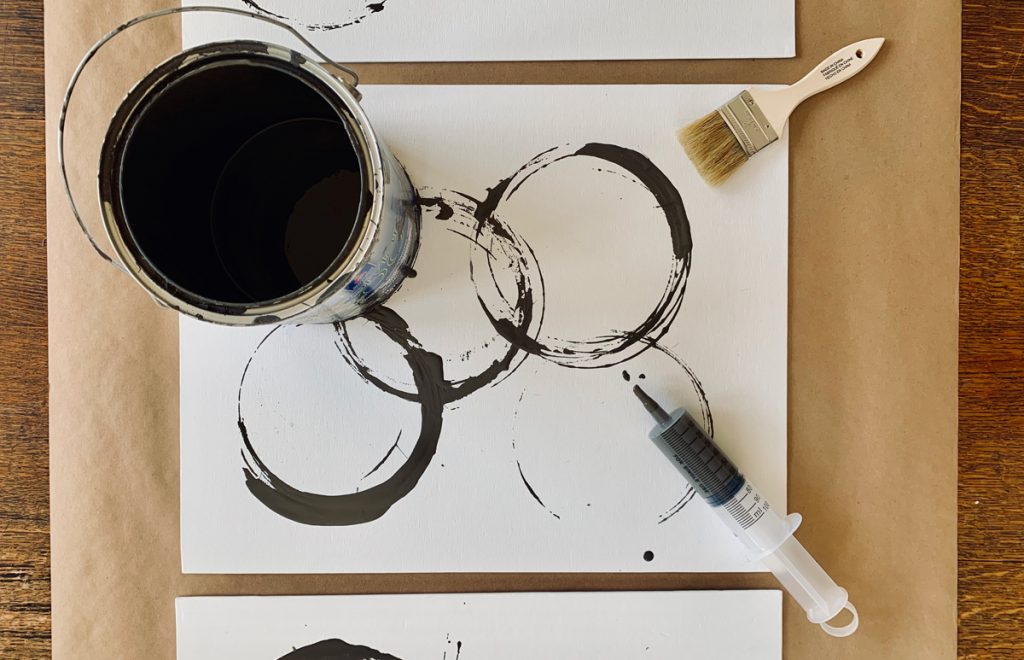
Gather all of your supplies!
Timeframe: 15 minutes
Buy your supplies in advance.
You will need:
- 4 pack of canvases– Michaels 50% off . (The size shown here is 20″ x 24″)
- 4 matching frames– Michaels 50% off
- Large syringe-The one shown in these photos is a catheter syringe
- Paint brush-old or new any size 1” wide or larger.
- Old paint buckets with a small amount of leftover paint inside.
- Drop cloth, craft paper, or old newspapers to spread down as a work surface to protect against any paint drips or spills.
Note: Before you buy your frames be sure your canvas sizes match up with your frames.
You’re looking for standard sized canvases so the canvases drop right into the frames with mats and no cutting or reshaping is needed.
Designer Tips:
Note: For this blog I used a 1 gallon paint bucket in a single color. You can also use quart paint cans. Or 2 different paint colors can be used for an even more dynamic, layered look. Be sure to do one color at a time letting the first color completely dry before coming on top of it with a second color. The wet paints will blend giving you “muddy” colors.
Now let’s get started…
Part 1
Firstly, put on old clothes, and put down a drop cloth, craft paper, or old newspapers on a large flat surface where you want to be working. I recommend being outside in an area where you can leave the canvases to dry flat for about 30-45 minutes after completion.
Note: You want to leave the canvases flat to dry or the paint will run.
2) Layout your canvases on your work surface. I lay them all out at one time.
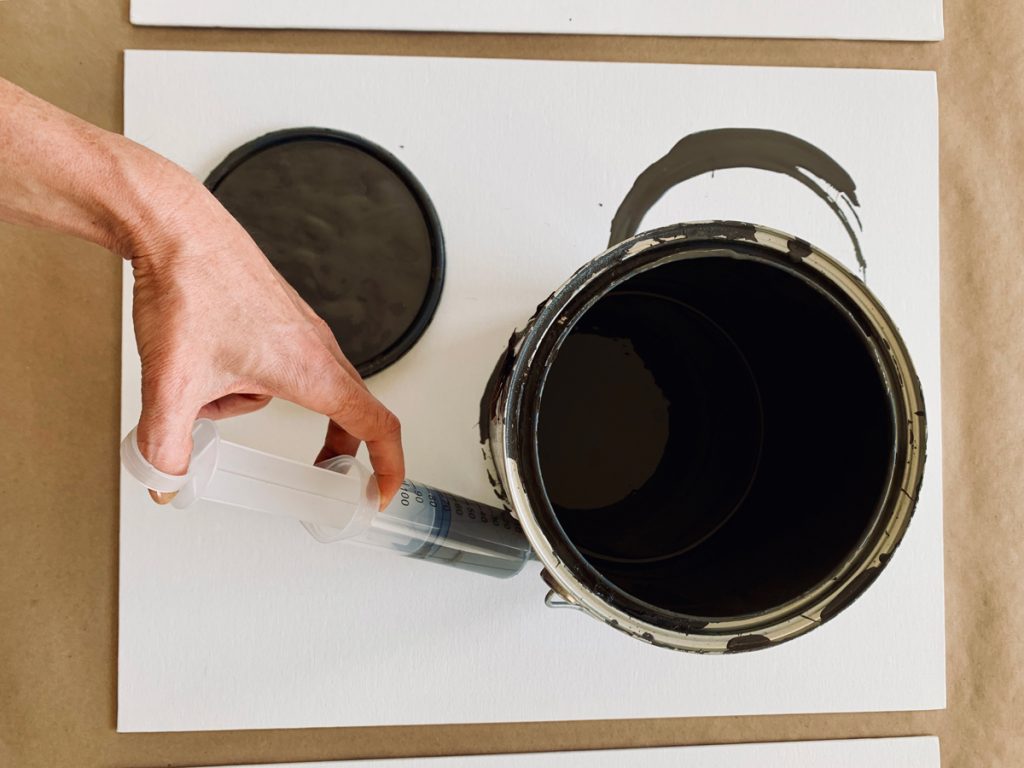
3) Open the paint can, or cans, you will be using. Stir up the paints to incorporate all the ingredients and pigments that may have separated or settled.
4) Get your large syringe and draw paint into the syringe from the bottom of the bucket.
Note: Feel free to do a trial run on scrap paper at this time.
5) After your syringe is full of paint. Set your paint bucket on your canvas.
6) Put the tip of the syringe at the bottom of the paint bucket and squeeze paint on the side of the paint bucket about 1/2” above the actual bottom edge.
7) Let the paint from the syringe run down the side of the paint bucket to the canvas.
8) Feel free to spin the paint bucket in a circle keeping contact with the canvas, or simply pick up the paint bucket and set it back down on another area of the canvas without adding any additional paint to the base. This will produce a lighter ring of paint on the canvas.
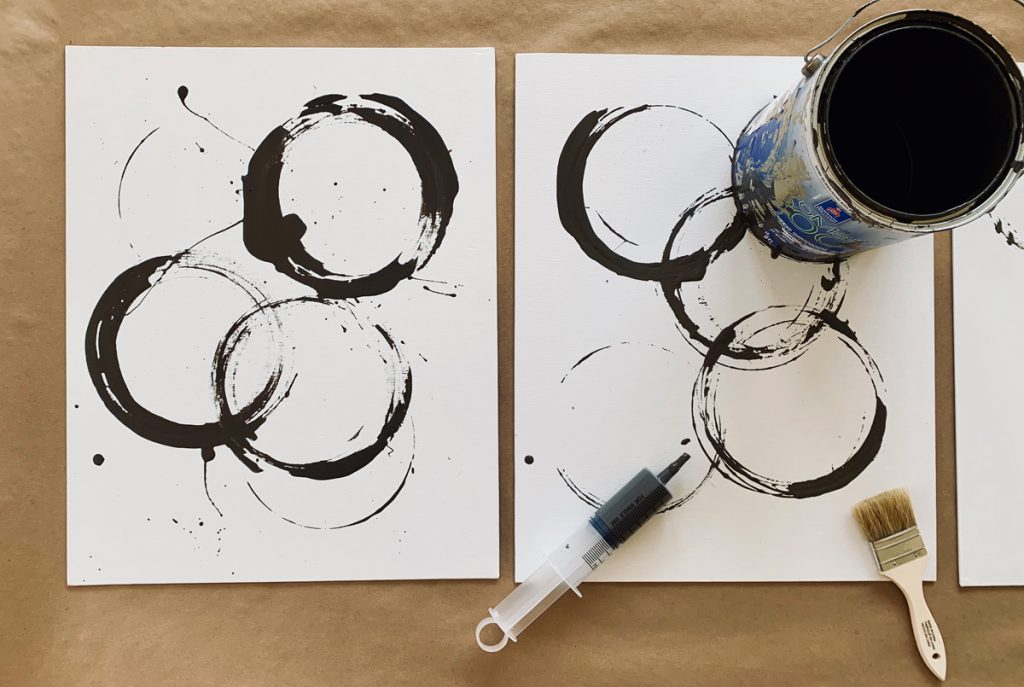
9) Repeat the process of adding paint to the base of the paint bucket with the syringe and making irregular, overlapping circles of paint on your canvas.
10) Once you have the circles of paint added on your canvases. Feel free to add a few sprays or drips of paint.
Part 2
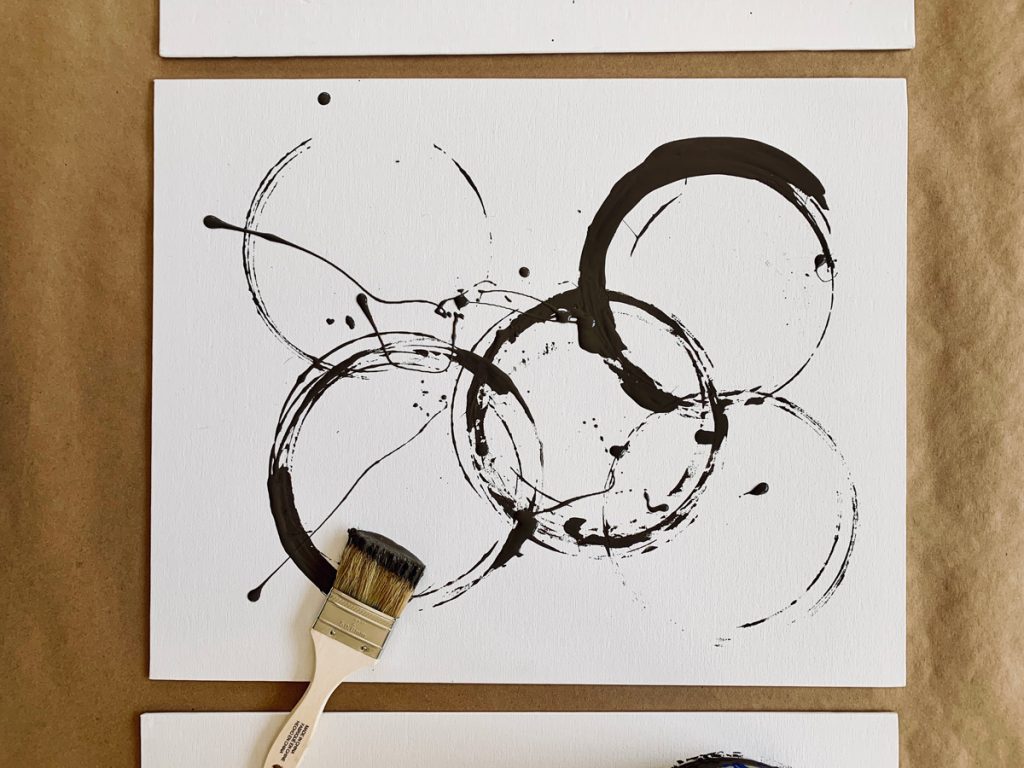
11) Get your small paint brush then set your paint bucket off the canvases.
12) Dip your paint brush into the paint bucket putting a small amount of paint on the end of the paint brush, then with your paint brush in one hand, hold it at a 45 degree angle and flip the bristles with your other hand. This will spray paint in a line on your canvases as the bristles flip back into place. Again, this is a good time to practice on some scrap paper.
Alternatively, you can also get drips or sprays of paint by dipping the paint brush and slinging/slapping the brush bristles down towards the canvas.
Be warned!! This will get paint on your surrounding areas.
13) After you have your canvases complete leave them flat to dry. Approximately 30-45 minutes depending on the amount of paint on the canvases.
14) Now, Voila!, the last and final step! Simply place your canvases in the frames and hang on the wall.