A behind-the-scenes of “Southern Spitfire” Episode 1 on HGTV. Get the Bead Board Wall look in Episode 1 of Southern Spitfire on HGTV!
There are several need-to-know tips to pulling off this look, but it’s so easy and amazing,… not to mention cost effective!
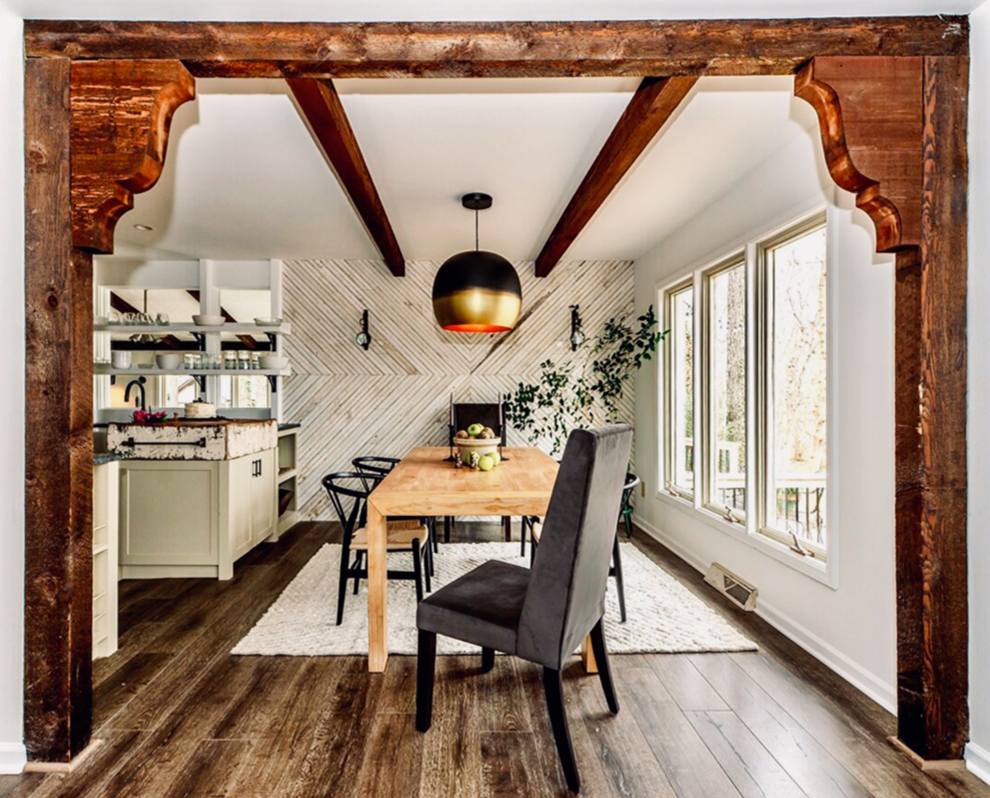
How did I get that geometric Bead Board Wall look in Episode 1 of HGTV’s Southern Spitfire?
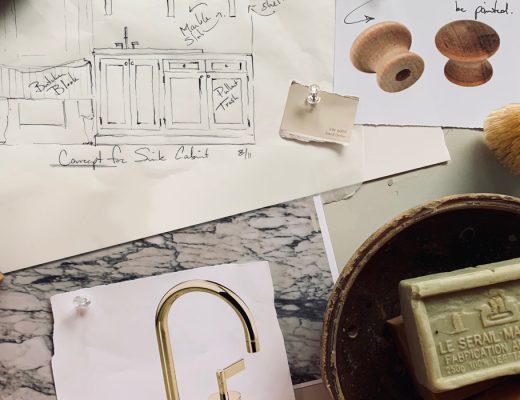
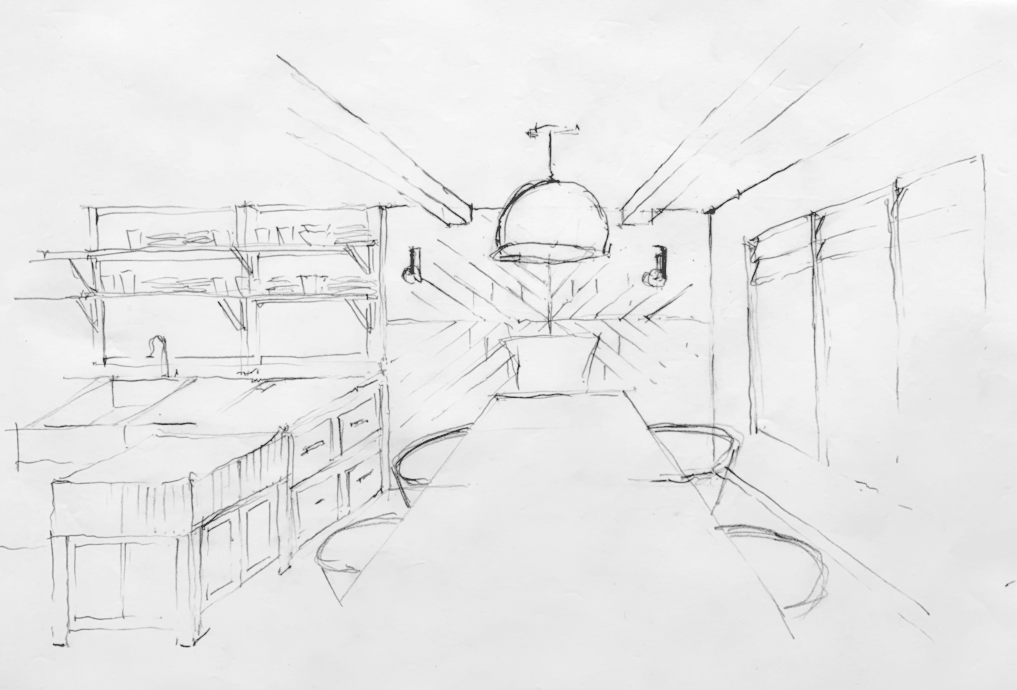
I started with a sketch… quick and dirty.
Then I asked myself:
Is this the feel we want for this house??
Is it too rustic even with the more modern lines of the dining chairs and table and overhead dining pendant?
No. In my heart I liked the mix we were creating. It’s updated and approachable, but with “roots”.
Also, I knew this one single feature (just a single wall 10’ wide of old bead board) was going to define the dining space. By doing this, now we actually have a “room” with its own identity even though it was open to adjoining rooms on 2 sides!
This is a common problem with open floor plans… how do you define a space but still have it visually blend with the adjoining spaces.
Problem solved.
Here are my must know tips if you’re thinking about taking this look on in your home!
Tip #1
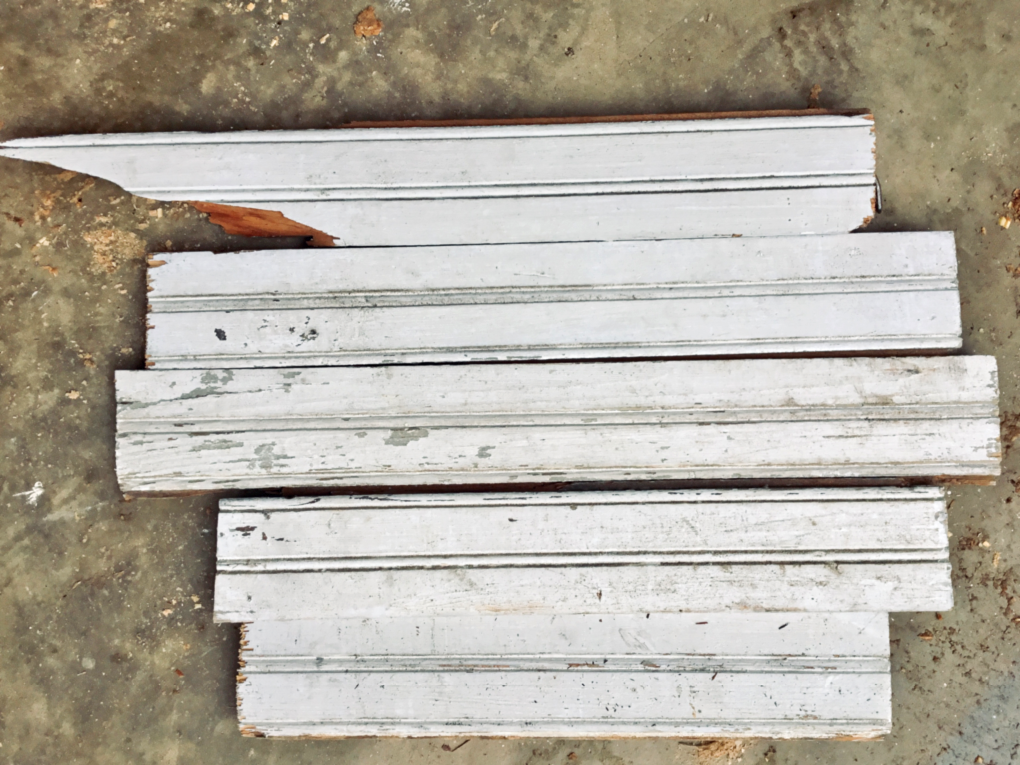
Save all scraps and all short pieces left over from the bead board removal process. The demo process of removing old wood doesn’t produce equal length boards. This is old, super brittle wood! We got some 4’ pieces and some 4” pieces. The goal is to use all the wood we removed by designing a symmetrical geometric pattern, so pieces of bead board that are even 4”…5”… 6” long, are utilized. Save them folks! It’s gonna save us money. We’re using less material by using ALL the wood we reclaimed, not just the long pieces. That’s why I did a geometric pattern so we could use all the wood we reclaimed. Even those little bitty bad boy pieces that are 4” long have a place in this design.
Tip #2
Kiln dry the wood. Old wood has the potential to come with bugs and or insect eggs. Just to be safe pay someone to kiln dry the wood. The heat will kill all existing bugs and eggs. Yes, you could skip this step, but you may soon find bugs in your hardwood floors and wood furniture, and folks, that is a nightmare. Even if you aren’t reclaiming this wood yourself, maybe your buying it off Craig’s list, kiln dry the wood!
Tip #3
Apply the Bead Board over sheetrock, even though the sheetrock will not show. You need a support to attach the short boards to the wall. With shiplap for example you don’t necessarily need to have a back for support. It can be nailed directly on top of studs because it is in long enough pieces to overlap the studs. But with the short pieces of wood used to create a geometric pattern, you will need sheetrock or some sort of sheet good over the framing studs to nail your bead board onto.
Designer Note: When we installed the bead board wall we didn’t shoot trim nails into the face of the boards. That method leaves small holes or indentions that are visible, or would need to be filled/painted after the install of the wall is complete. We shot trim nails on the side groove of the boards similar to how you install nail down hardwood flooring. That way the nail holes didn’t show on the face of the boards after completion. I knew I didn’t want to paint this wall so that was a super important detail to me!
Tip #4
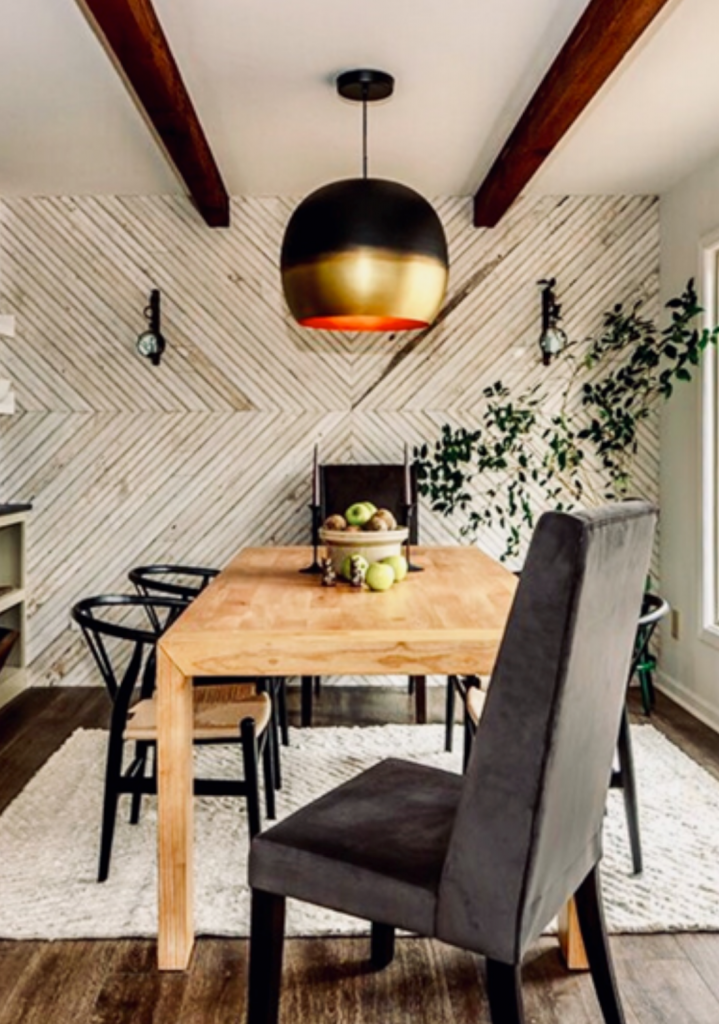
Figure out your pattern. Do not just start nailing up pieces.
*Hand smack*…
No, no, no, put down the nail gun!
You don’t have to be able to draw to get creative with the pattern. Get a piece of children’s chalk, a pencil, or even some painters tape and play with different patterns on the wall. Draw the patterns directly onto the wall… why not?… you’re gonna cover up the wall anyway with wood. Take this extra step to be sure you understand what look you want.
Designer Note: Also before you start nailing. Measure the back of the piece of furniture that will be closest to the wall of bead board. Then add 6-8” to that height. In this case I measured the back of the tall dining chairs and raised the horizontal center line of the overall pattern 8” to ensure the gorgeous center of the pattern visually cleared the back of the chair!!! Just because the pattern is symmetrical doesn’t mean you cannot raise the pattern so it’s not hidden behind a piece of furniture!
Tip #5
Don’t clean it or paint it if you want this look. Get it all in place first then assess how you feel. Once you paint it, or use spray cleaner directly on it, there is no going back folks ! If it’s up, and your not loving the color/dirt, get a few scraps from your bead board scrap pile and experiment with finishes that you might be interested in. That way there is no commitment to a color you don’t absolutely love and you know exactly what you’re getting when you have dialed in the look you’re after!