This is my no fail technique for laying out cabinet hardware.
As an interior designer my job is two fold… one to get the best look possible for my clients while engaging their thoughts and input along the way, and two, once my homeowners approve the design then it must be executed in the field to see their exact wishes to fruition!!
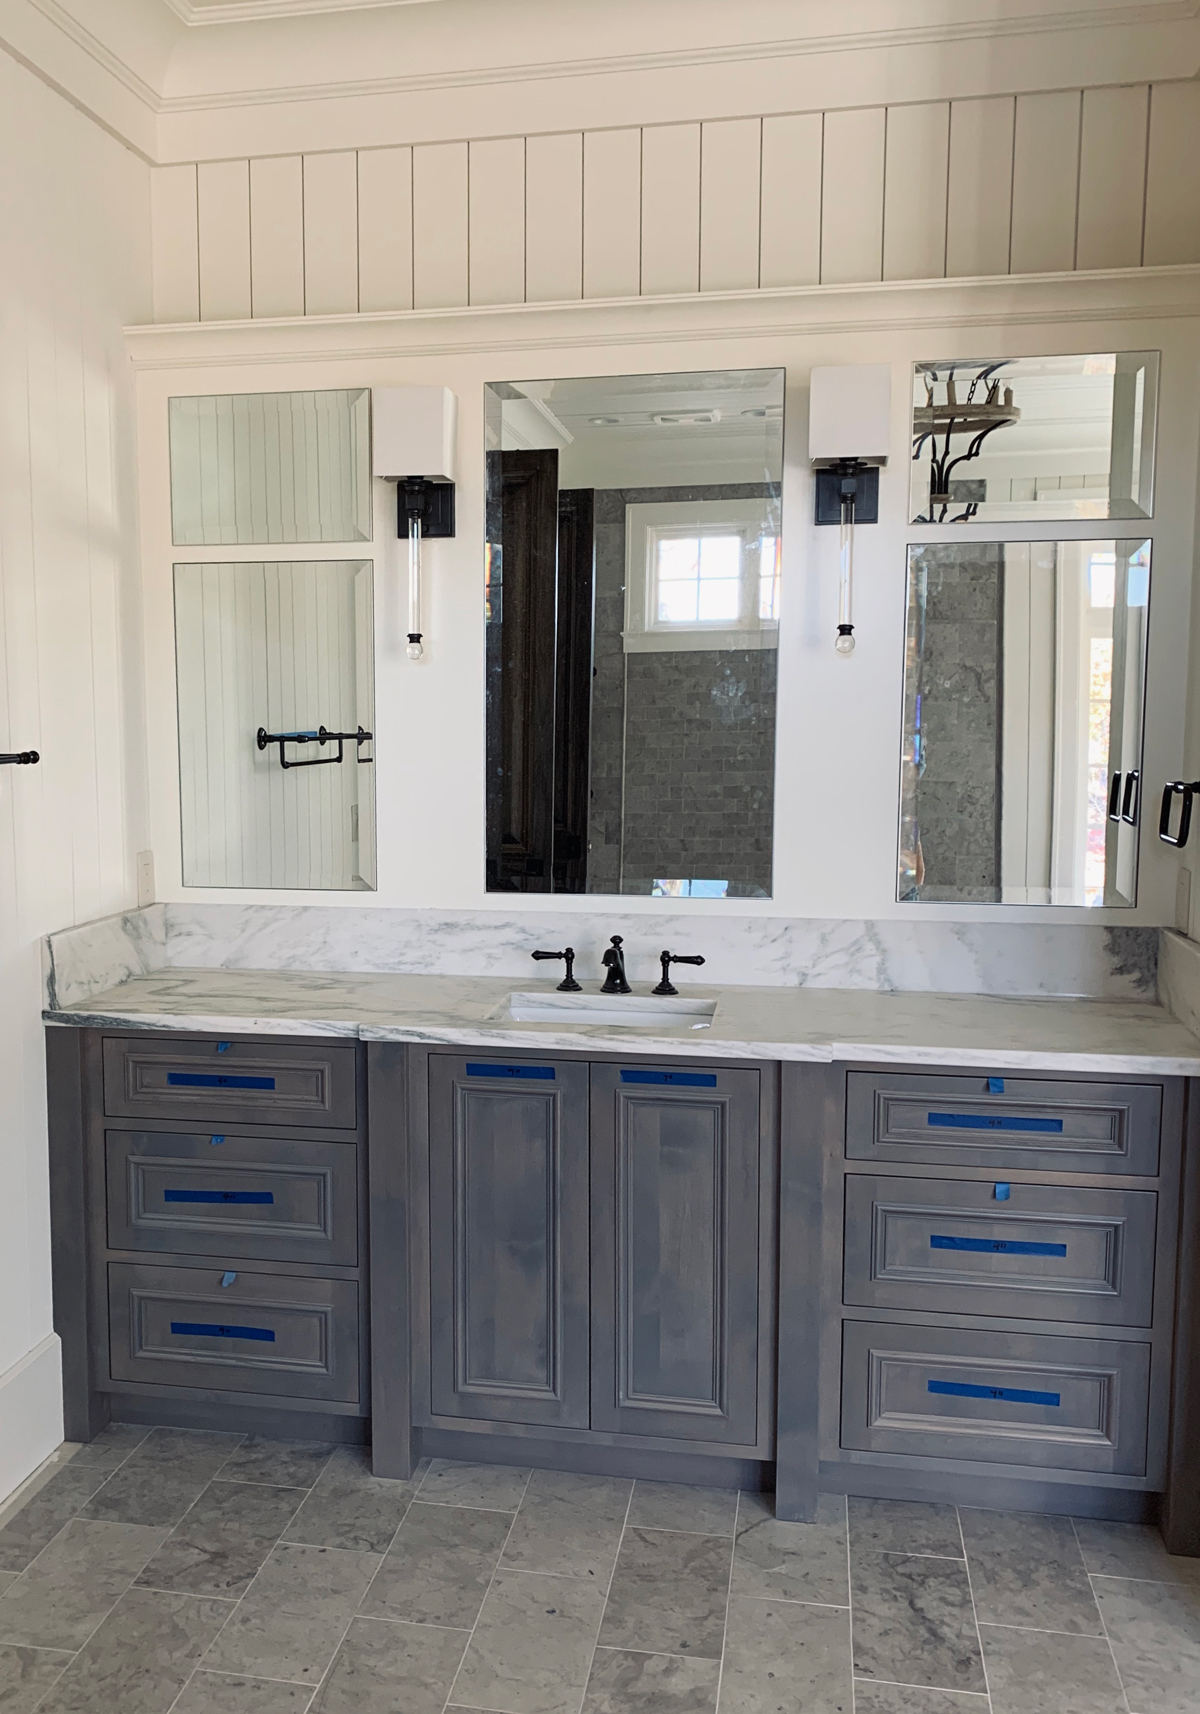
No detail is too small in the pursuit of getting my clients happy. So not only is this a no fail technique for laying out cabinet hardware, it also works for laying out bath hardware! Take your time with these details folks. Trust me as an interior designer, this is what makes good designs Great!
So when it comes to cabinet hardware there are several questions you need to answer.
• Do I want a knob or pull?
• What length pull, 6”,9”, 12”? Different hardware collections have various size pieces.
• Where to place the hardware on the cabinet door or drawer face?
These are all questions you need to work through to be sure your getting the best look possible. Whether it’s a kitchen, bathroom, home office or mudroom that needs a cabinet hardware layout, this is an insider look at the best trick in the industry… that anyone can do.
Here is my technique!
This technique let’s you experiment with different looks and locations. And as an added bonus… the technique also provides accurate hardware installation. Trust me you need to be able to accurately communicate your wishes for the hardware install after all the products arrive even if your putting the hardware on yourself this helps remind you of what goes where.
Let’s get started:
Here is what you will need…
Items you need to gather:
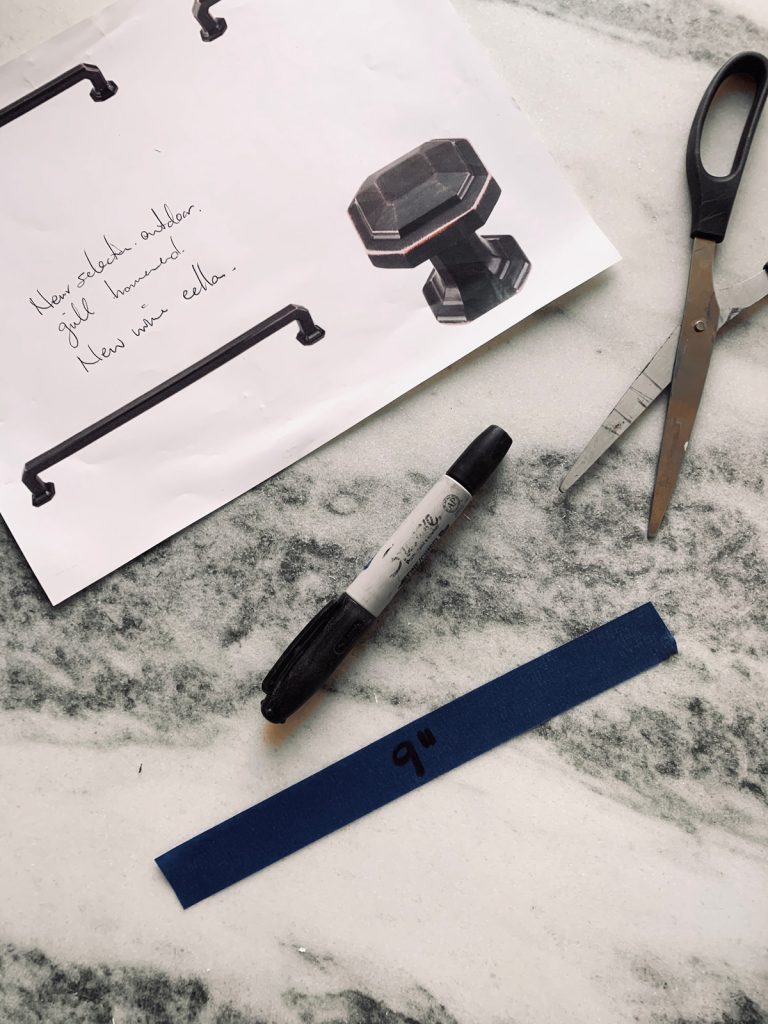
- A print out of all the hardware pieces that come in the cabinet hardware series your interested in. Please note cabinet hardware pieces vary per collection/series. For example you might want a 8” pull but the collection your interested in doesn’t offer an 8” pull.
- Sharpie
- Painters tape roll 1” width. I recommend only using painters tape to protect the finish on your cabinets.
- Tape measure
- Pinterest or inspirational images of hardware layouts you like.
This is the fun part:
Guys know up front… the main reason we are using painters tape is so we can make changes and experiment with the look we like best, so relax and enjoy the process until you get the layout exactly the way you want it.
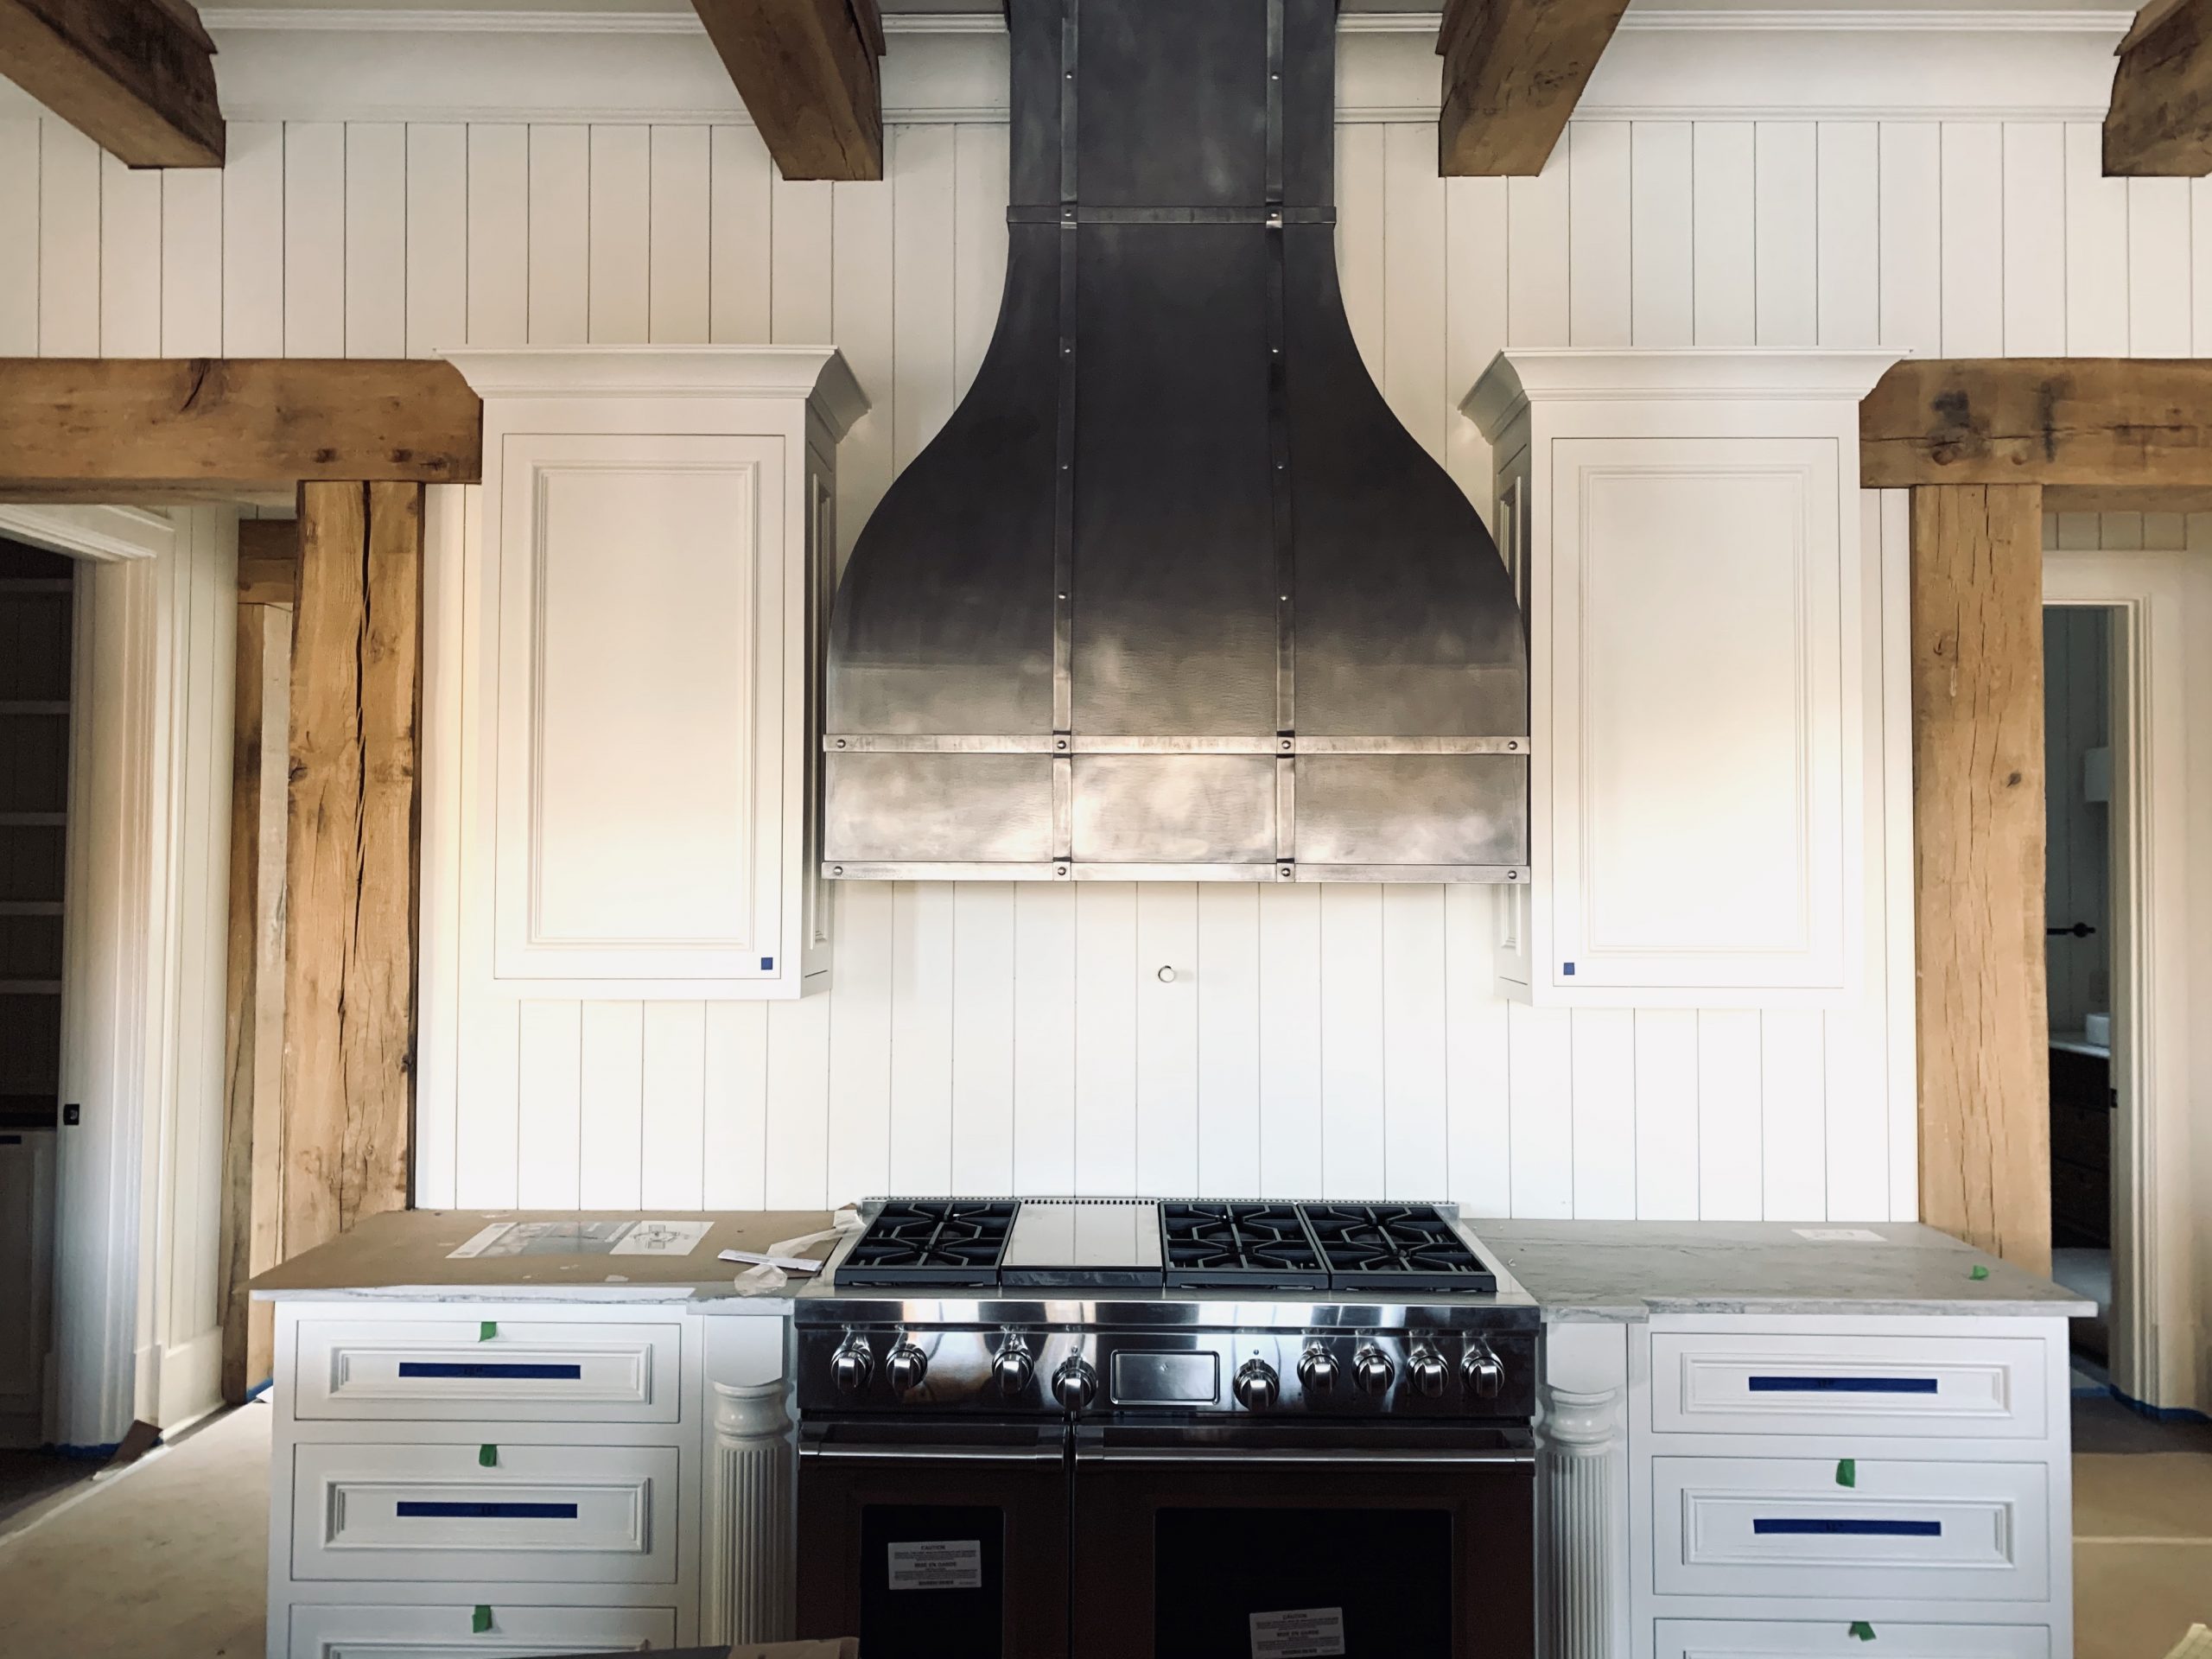
- 1) All of your cabinets need to be installed. Not your countertops. Just the cabinets.
- 2) Now start on one side of the room, and decide a look you might want to try with the tape.
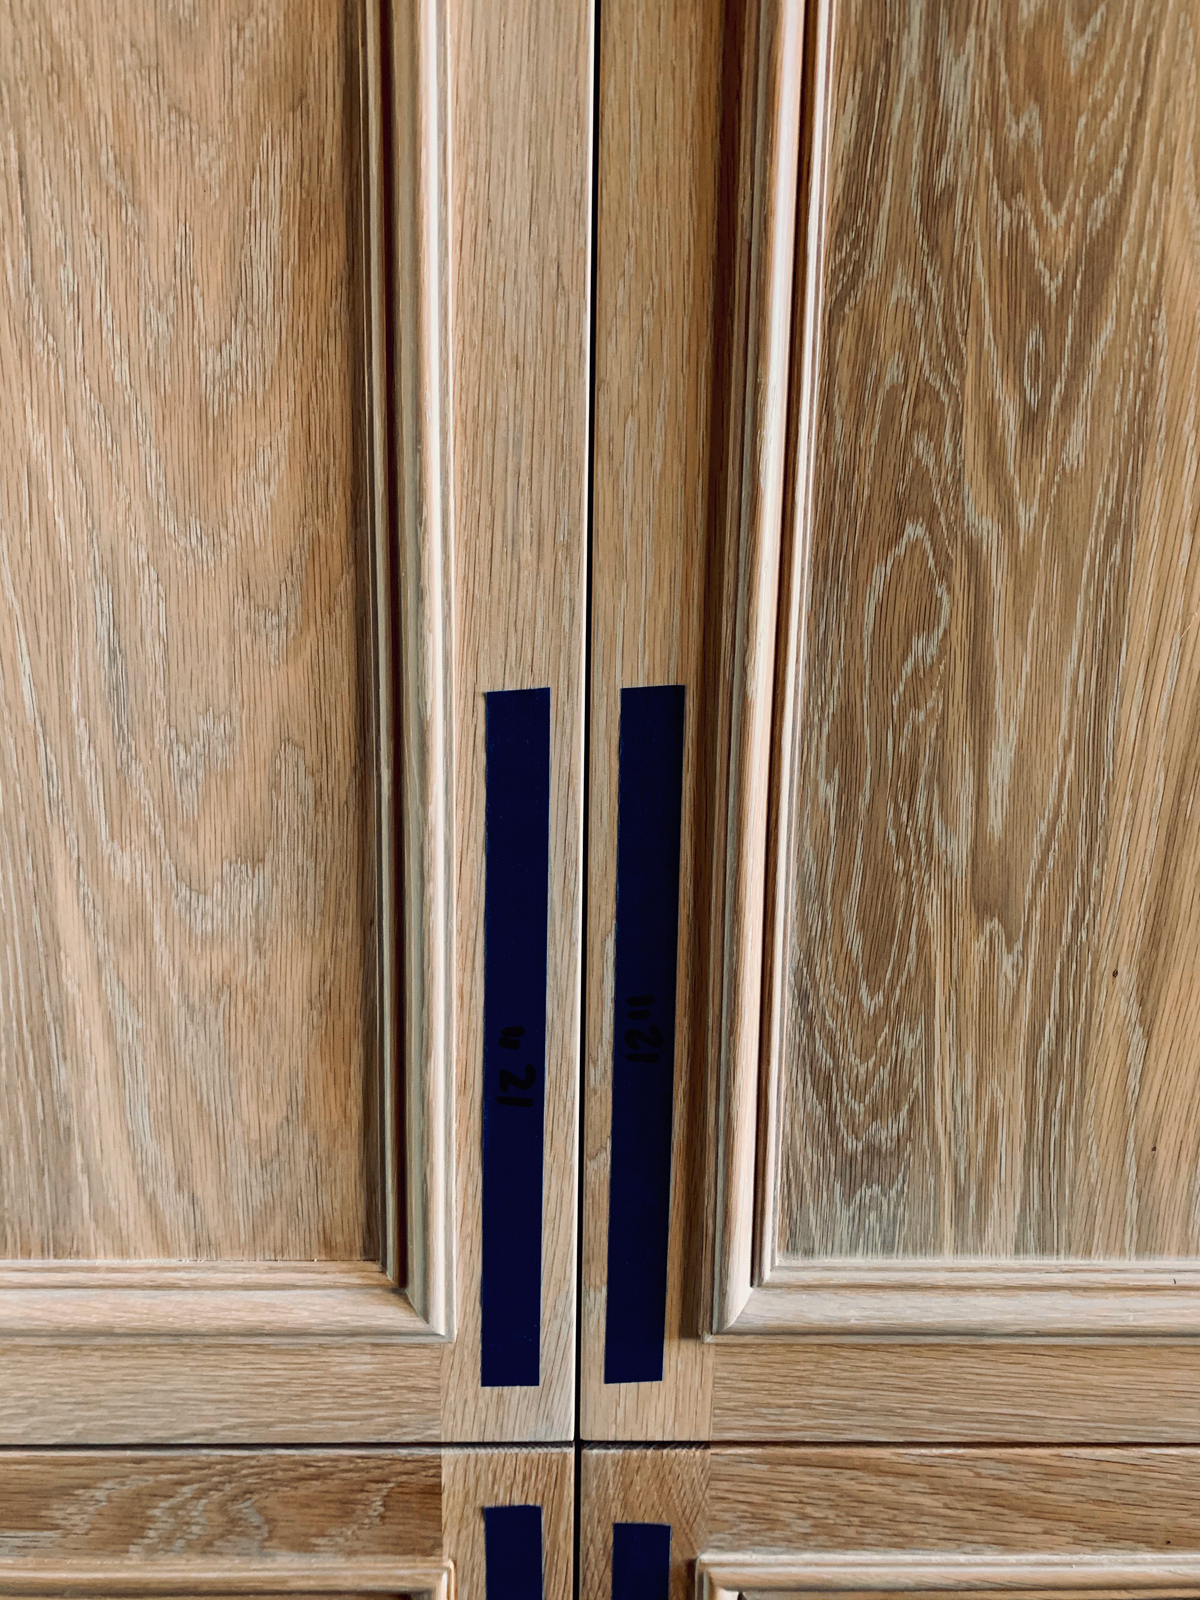
- 3) Look at the cabinet hardware pieces offered in your collection. For example if you want a 4” pull measure a piece of painters tape with your tape measure to represent the length pull you want to try. See image below.
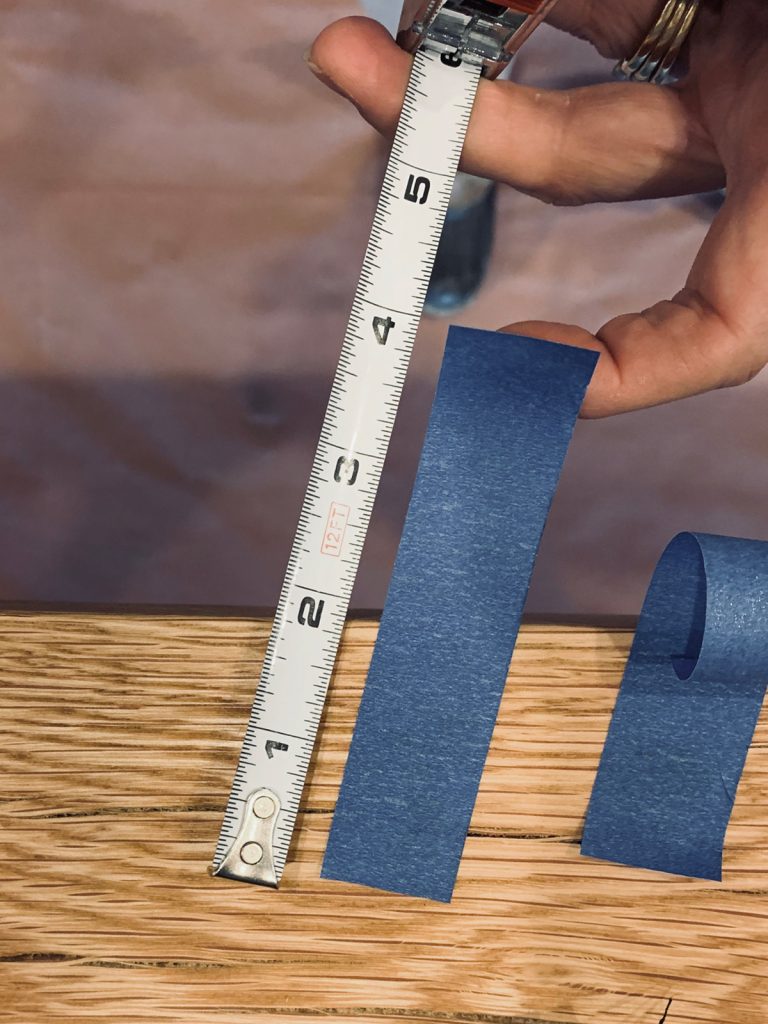
- 4) Cut the painters tape to length. A 4” cabinet pull is represented with 4” strip of painters tape.
- 5) Take your sharpie and write the length of the pull and name of the collection.
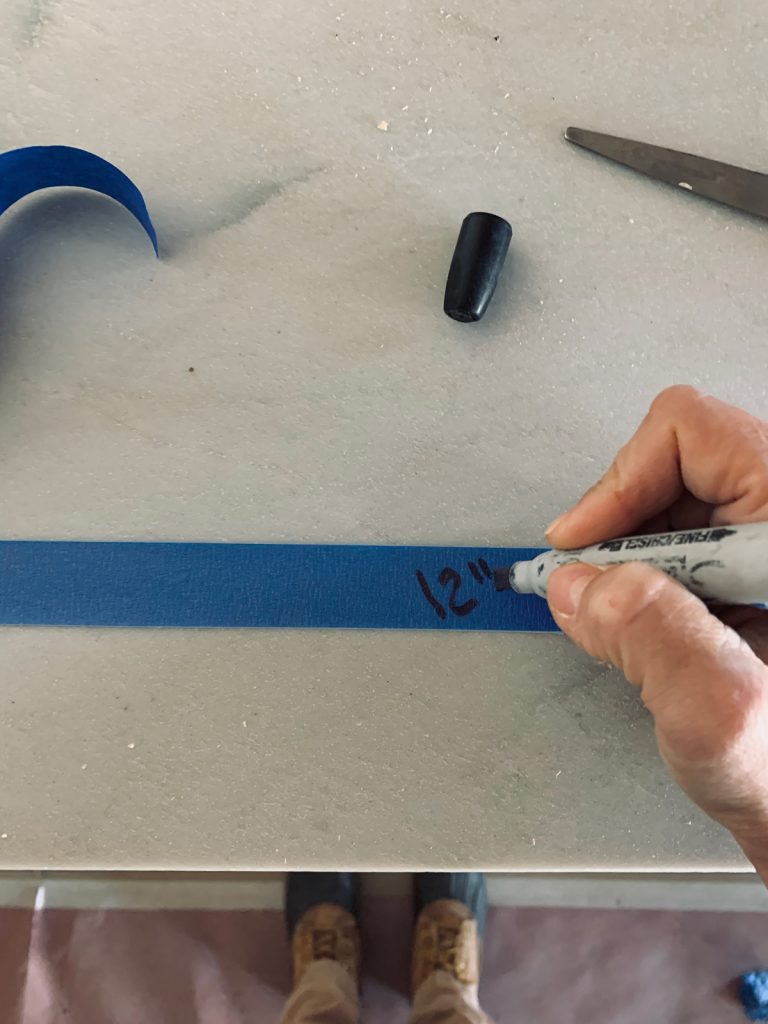
- 6) Be careful with the sharpie not to accidentally get permanent marker on your cabinets or countertops as your writing on the tape. I recommend writing on the tape before it’s placed on the cabinets.
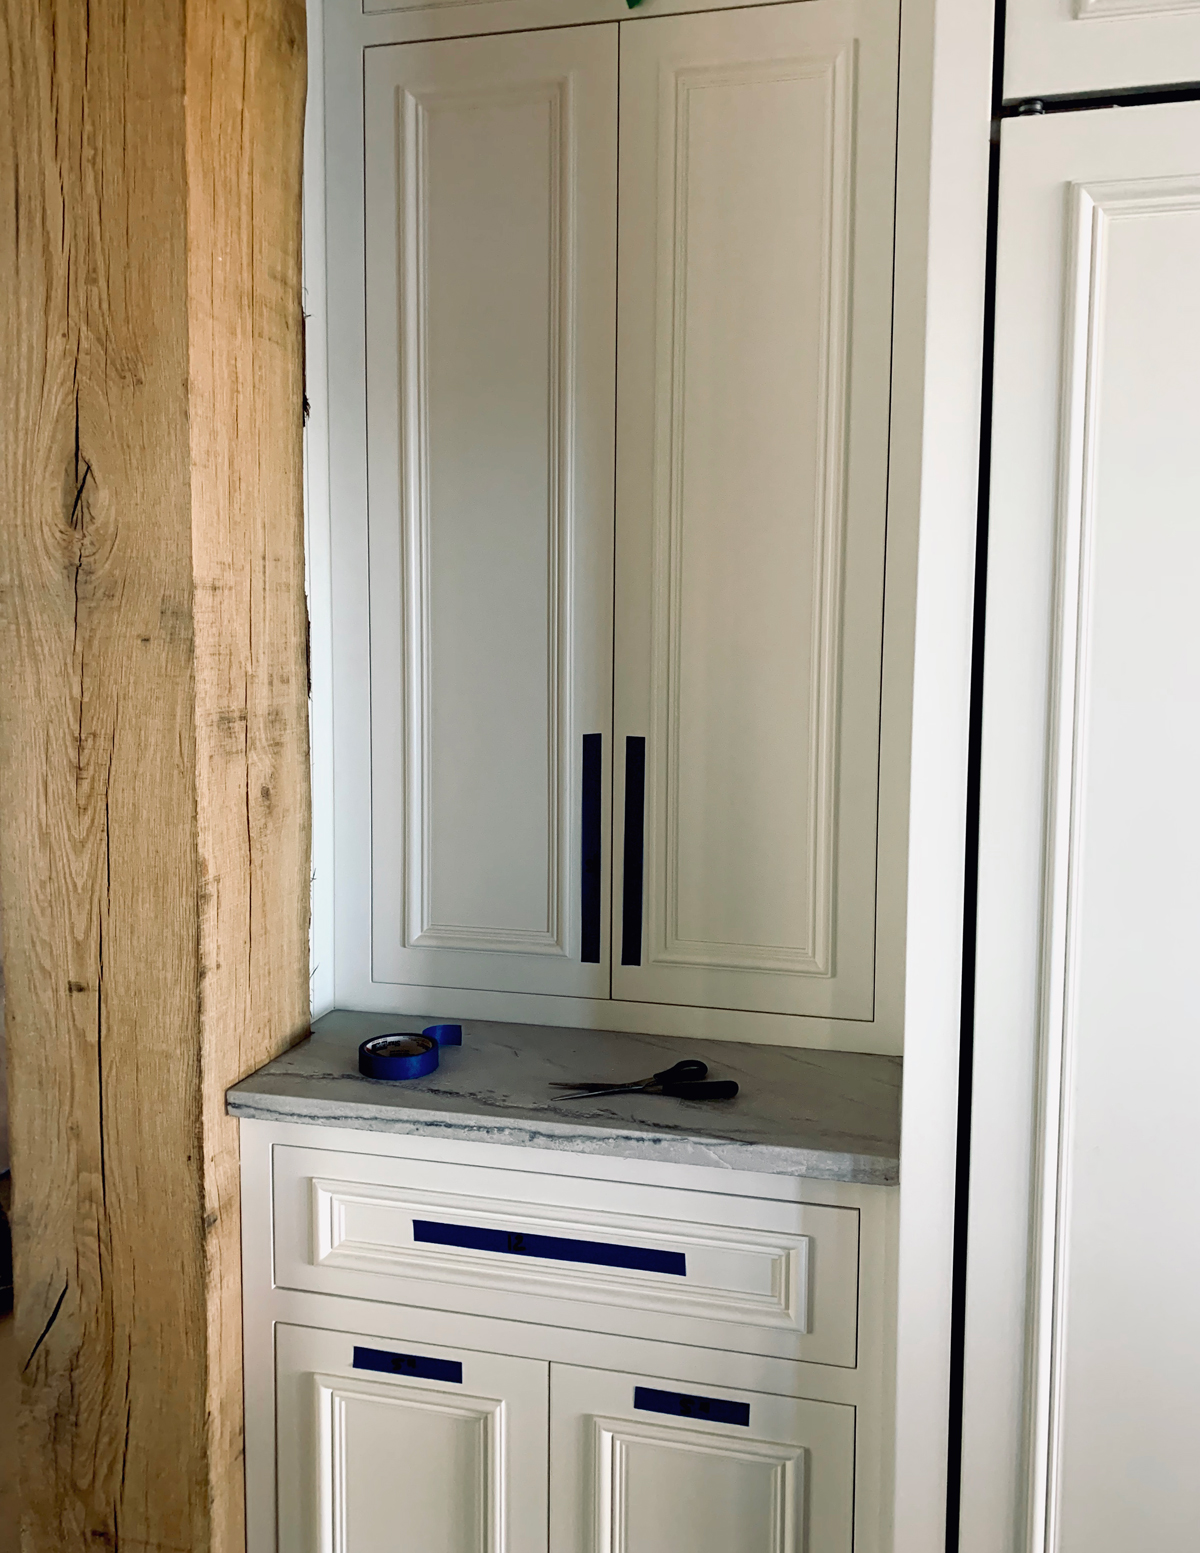
- 7) Place your measured strip of painters tape where you might wanted pull to be located on the cabinet door.
- 8) For knobs simply cuts 1”x 1” square piece of painters tape.
- 9) Feel free to experiment with a mix of knobs and pulls as well as different length pulls. The great news is the tape strips are easily moved around or simply tossed if the look isn’t what you had I’m mind.
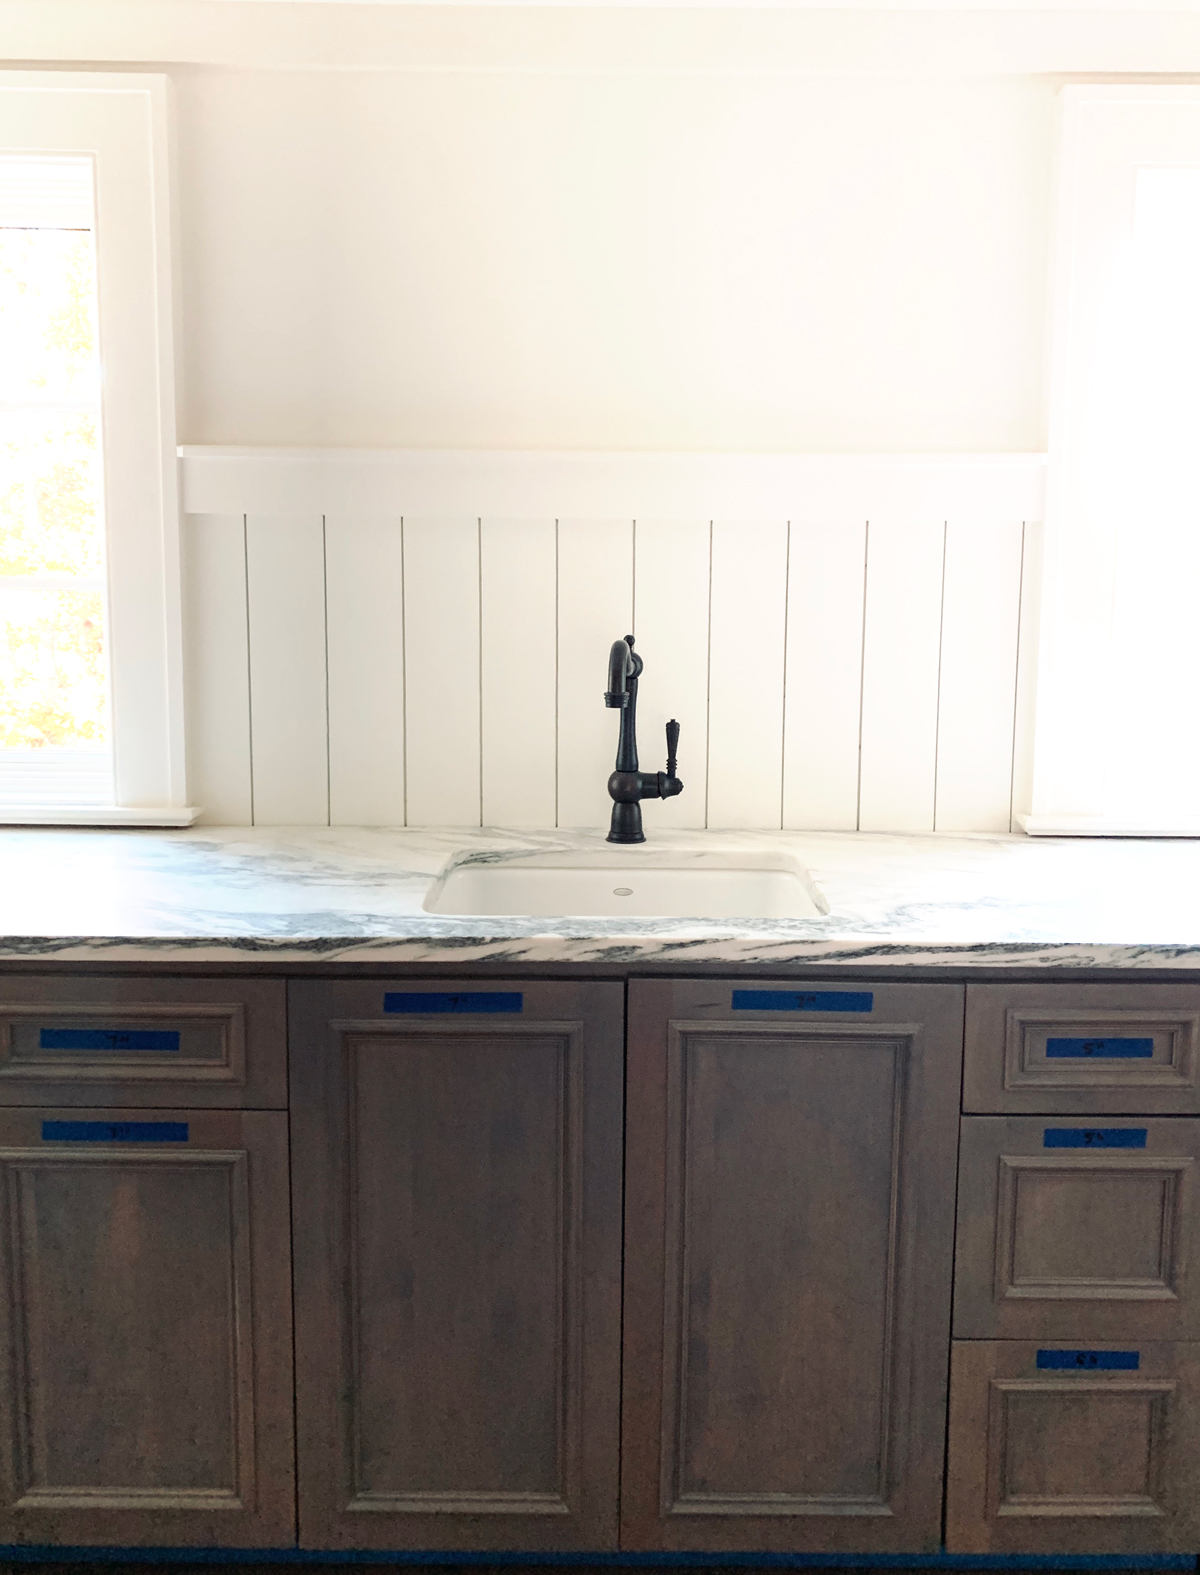
- 10) Once you have a hardware layout completed in tape placed on your cabinets… leave it all in place. Count up the different sizes of hardware you need for that room.
- 11) Place the order for your cabinet hardware or format the items in a simple spreadsheet broken out by room and pass it onto your builder. Continue to leave your tape on your cabinets!
- 12) When the cabinet hardware order arrives, you/or your builder will know exactly where each piece needs to be installed because of the tape layout.
- 13) If your builder is installing the cabinet hardware… take a photo of all tape layouts. Once the cabinet hardware is installed use the photos to double check everything was installed correctly.
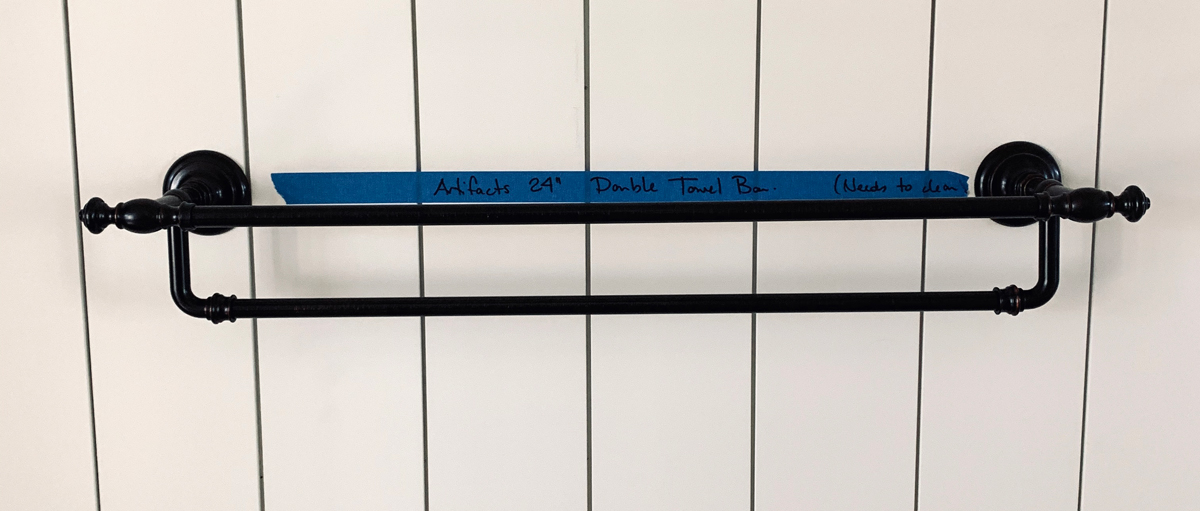
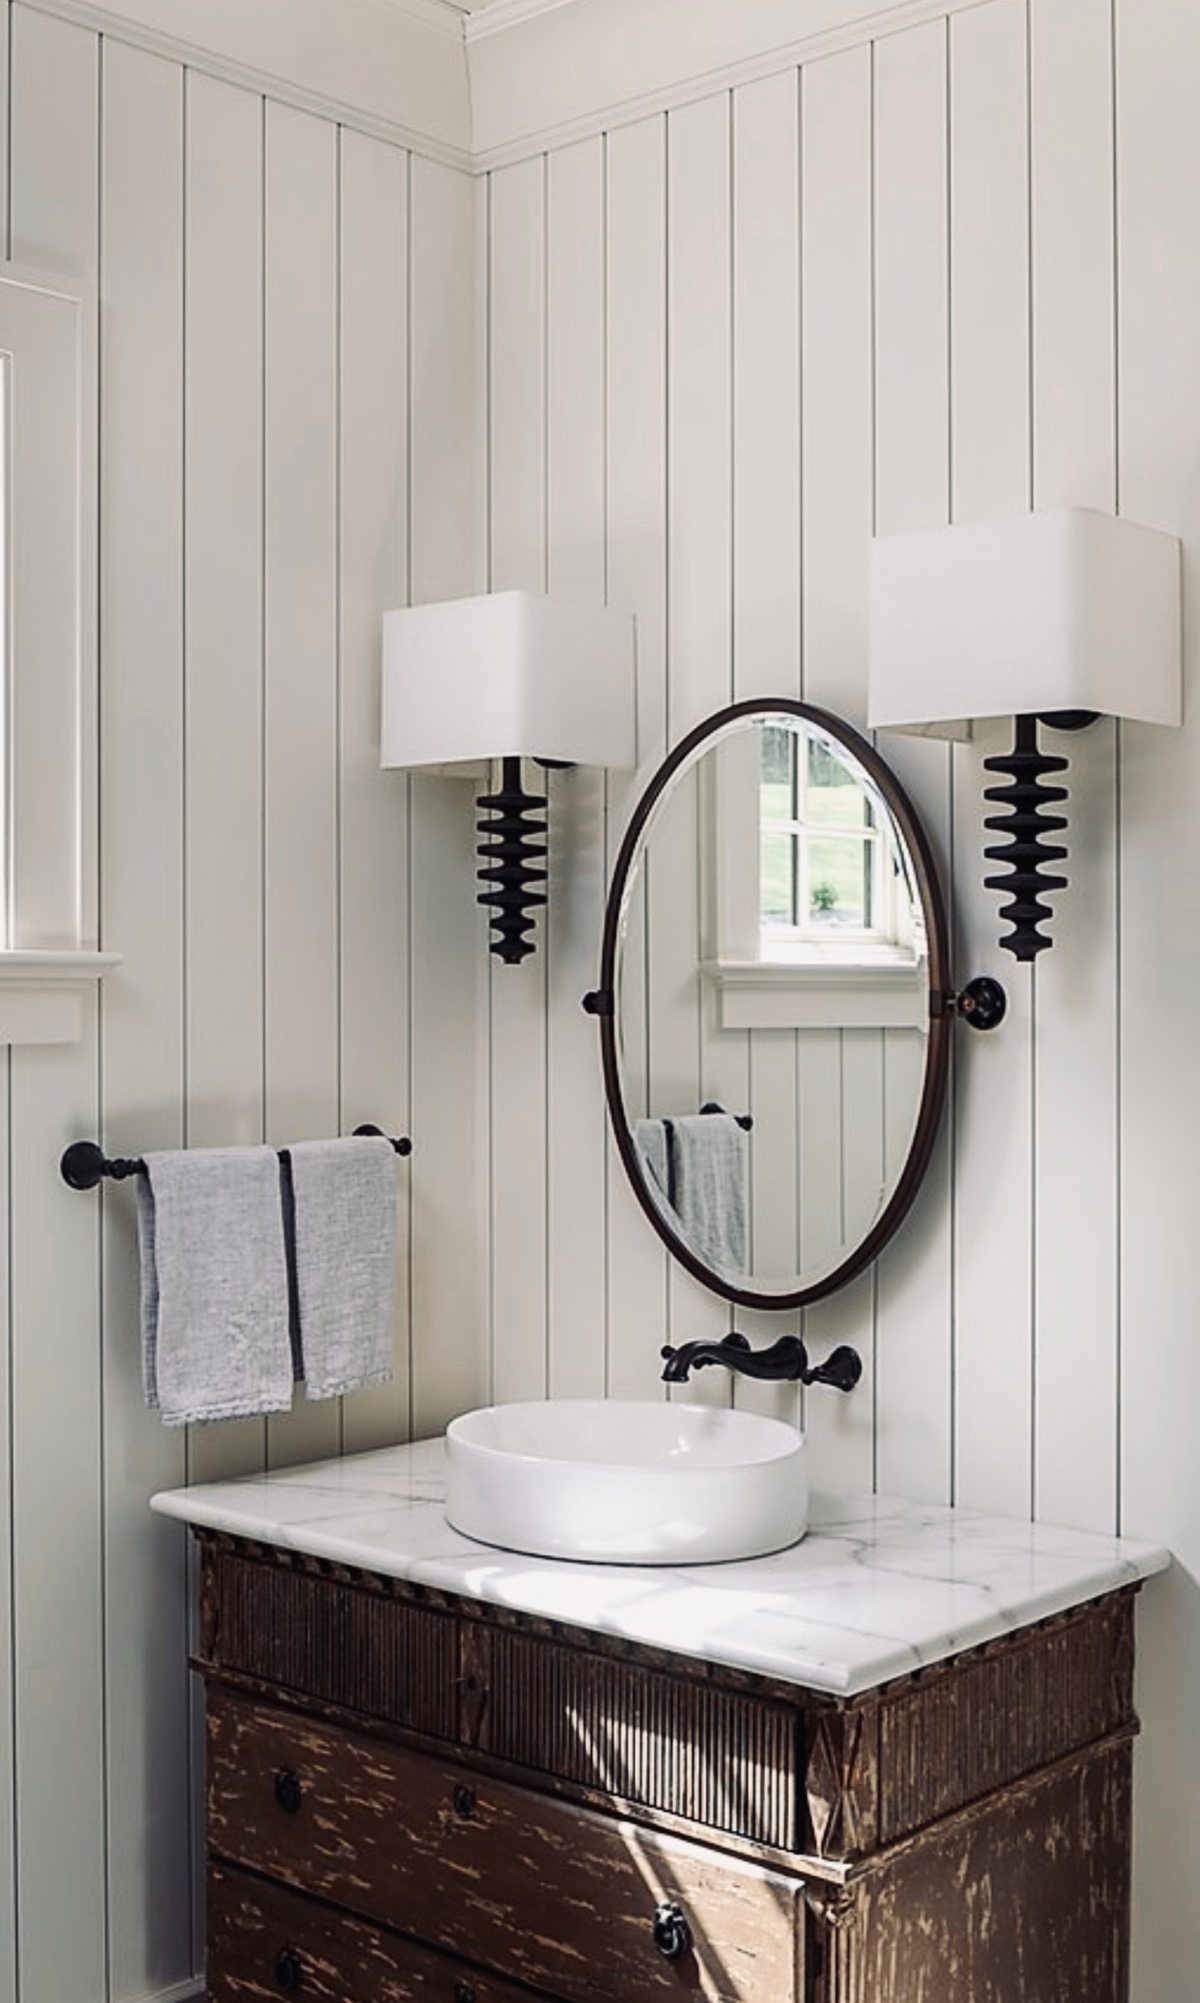
This is also a great method for bath hardware placement and selections. This is the towel bar we placed in the Powder Room. It has the name of the collections for length written on the tape.
Designer Tips:
- Consider using 2 knobs on a long drawer or….. one long pull.
- Experiment with the orientation of your pulls. Do you want to mount it vertically along the side or horizontally centered across the top?
- What about using a completely different cabinet hardware/finish on the island to differentiate it from the rest of the cabinets.
- If you place a towel bar over a vanity or countertop, be sure to measure the length of your folded towel to be sure you clear the surface below.
I’d love to see what you’ve done with your own new or renovated cabinets! Let me know!
Xoxo Abbi
More of my favorite tips!
Mid-Century Modern… all from a secondhand store!
Aluminum carry-on luggage… 6 things no one tells you!
Casual Fall Brunch… with Crepes!
Retreating to Lake Chatuge… My 5 must haves!
Paint Can Art
Classic and Easy Easter tablescape… Step by step
Decorating with tree branches
Turpentine Pots: Add History to Your Home
Why I’m OBSESSED with Pendleton Blankets!
Hydrangea and Figs Floral Arrangement