How to open a kitchen space by installing a window wall with floating shelves.
The Problem:
Older homes always present challenges. There are the low ceilings, little to no storage, and then there’s the kitchen. That closed off, tiny, and locked down room in the middle of the home!!!
As a designer I wanted to connect the kitchen to the surrounding spaces AND bring in more sunlight, but folks, this small kitchen was completely blocked in the center of the house by other rooms!
The Solution?
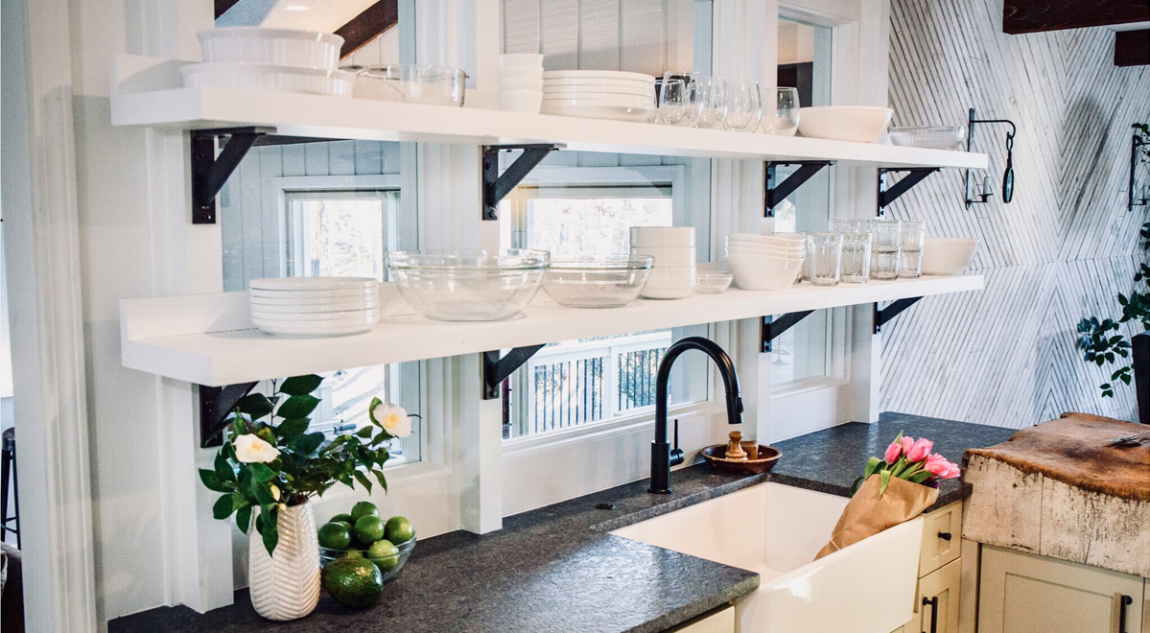
Floating kitchen shelves on an interior new window wall!
The Concept
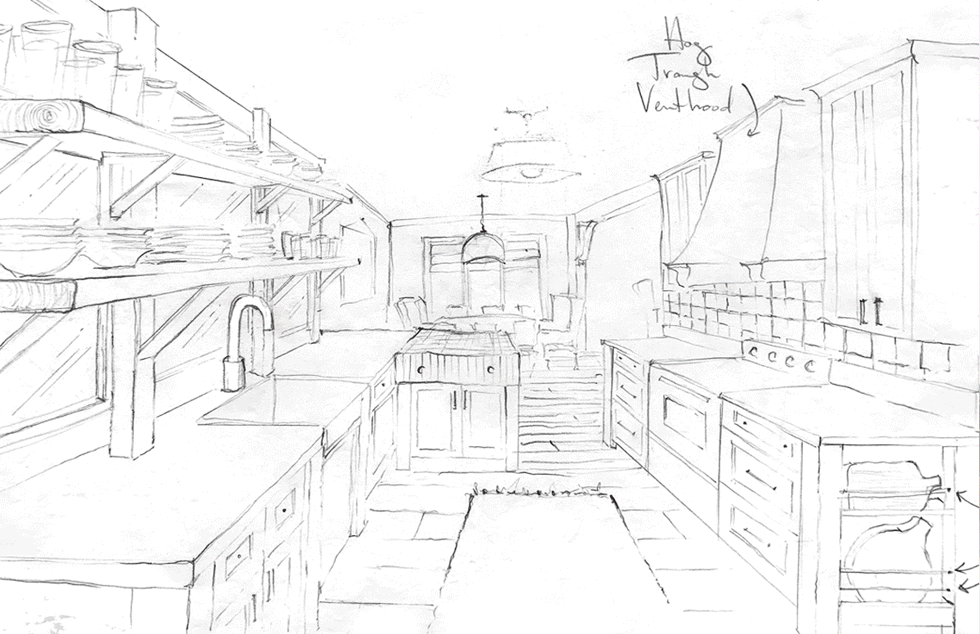
To start with, I created conceptual sketches on how to improve the existing kitchen without cannibalizing other rooms.


Secondly, I had to “sell” the homeowners on the idea of opening up the kitchen by adding glass down the left side of the kitchen, and removing all the upper cabinets on the entire left-hand side of the kitchen over the sink.
Then, to this completely opened wall add three, full height areas of fixed glass!
Finally, what sold the concept was that, even though these are interior windows which don’t have direct exterior access, they visually connect the kitchen to the room beyond, while flooding the room with natural light.
Added Bonus
The best part of adding the floating shelves over the window is that it actually added storage to the kitchen.


Designer Note: I bought a freestanding butcher block for 250.00! We cut the wood legs off and built base cabinets for the butcher block to rest on. Now, the butcher block is visually integrated into the overall kitchen and we added much needed storage beneath the butcher block.


If you love the look, here are 5 Designer Tips for incorporating this look in your kitchen:
1) You actually don’t need to buy windows for an interior space.
If the wall, where you’re adding the glass and floating shelves, is an interior wall, as opposed to an exterior wall, you don’t actually need windows. You just need tempered glass that’s trimmed out to be painted. It will save you money, as opposed to buying actual windows.
However, if the glass and floating shelves which you’re adding are on an exterior wall, then yes, you will need to buy actual windows, but not necessarily operable windows, because the shelves will partially block your access to the windows. Fixed windows are cheaper than operable windows… Just a thought.
2) Focus on the view.
When you’re adding glass to a wall, be sure you understand what the new “view” will be, and will it be a desirable view that you now have from the kitchen when looking through the glass??
3) Sunlight.
This is an amazing way to get more light inside a kitchen which is blocked off by other spaces in the core of the home. Be sure the area you’re “opening” up in the kitchen wall is a wonderful source of natural light. In other words, if the shades or drapes are always pulled closed in a room, look for another location to steal some sunlight!
4) Don’t do a single large window if your doing floating shelves over the glass.
You need to be able to support the floating shelves with brackets in the middle to prevent possible sagging. If you do a large glass window, you have 2 options for supporting the floating shelves. One is mounting the brackets on the ends of the window, or two, adding legs or supports from the shelves down to rest on the countertop. The latter I would not do, because by dropping the shelf supports to the countertop, you will greatly affect your work surface. Be sure you know what material you’re using for your shelf and know how you will support it to prevent it from sagging in the center. We used 1.75” cedar planed smooth and painted for our floating shelves.
5) Shelf depth.
These floating shelves were only 12” deep. We didn’t want to visually overwhelm the space with heavy shelving cantilevered out over the countertops. Our ceilings were only 8’ tall. (Folks, always keep the scale of your space in mind when designing the details.) We felt the 12” shelves were more accessible to the homeowner, who was around 5’3 in height. Ideally, you need to be able to reach items towards the back of the shelf for everyday use.
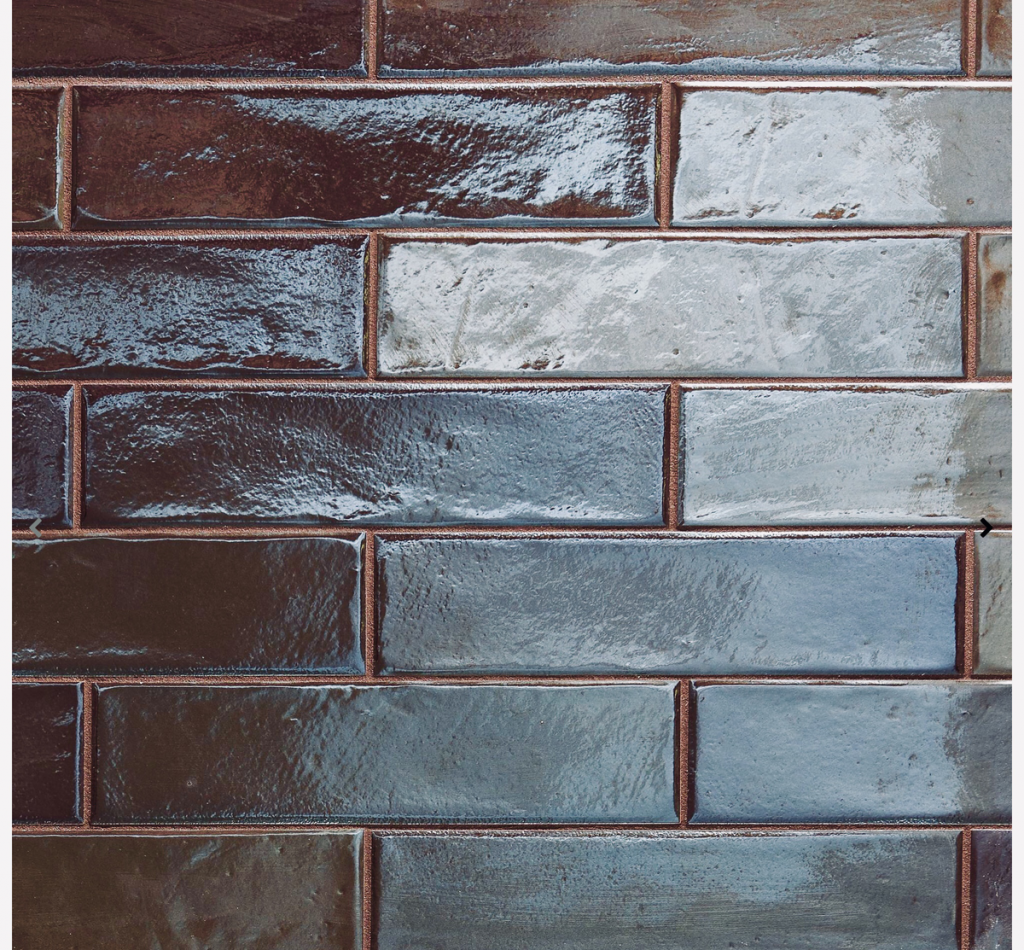
Designer Note: I wanted an earthy, rich element in the kitchen to anchor the design. I selected a hand molded, 3″x12″, espresso brown backsplash tile specifically for this purpose. It’s that crockery, scorched-earth, element represented in the form of a backsplash tile. Luckily they were .77 cents each! I am thrilled with the outcome for the homeowners who wanted a clean modern rustic vibe.
More of my favorite design tips!
Punching up a stairway with charm! Add a Stair Runner!
Get the Look!HGTV House Paint Colors
Geometric Bead Board Walls
Paint Can Art
HGTV’s “Southern Spitfire” with Abbi Williams
Classic and Easy Easter tablescape… Step by step
Decorating with tree branches
Turpentine Pots: Add History to Your Home
Why I’m OBSESSED with Pendleton Blankets!